

Posted on 11 September, 2023
Hyper-V is a virtualization platform developed by Microsoft that allows users to create and manage virtual machines on their Windows operating systems.
Hyper-V is a virtualization platform developed by Microsoft that allows users to create and manage virtual machines on their Windows operating systems.
To begin the Hyper-V setup, one must ensure that their system meets the necessary requirements. This includes having a compatible version of Windows installed, enabling virtualization in the BIOS settings, and having sufficient hardware resources such as RAM and disk space.
Users can start creating virtual machines using either Hyper-V Manager or PowerShell commands. It is important to allocate appropriate resources to each virtual machine based on its intended purpose. This includes assigning CPU cores, memory size, and storage space.
Additionally, network connectivity should be configured for each virtual machine to ensure proper communication within the network environment. This involves creating virtual switches and attaching them to specific network adapters.
Operating Environment:
| Item | Requirements |
| Virtualization Platform | ≥ VMWare ESXi 7.0
≥ Hyper-V (Windows Server 2012 R2) |
| CPU | ≥8 cores |
| Memory | ≥ 8 GB |
| Hard Disk | HDD 1: 8 GB (system area)
HDD 2: 50 GB or more (data area) |
| Supported Browsers
(We recommend that you use the latest version of a compatible browser) |
Google Chrome
Mozilla Firefox Microsoft Edge |
Windows Hyper-V Deployment
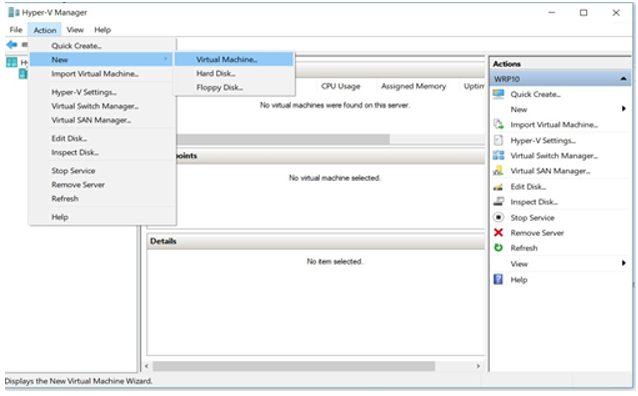
1. Start Hyper-V Manager and click [Action] → [New] → [Virtual Machine] to display the New Virtual Machine Wizard.
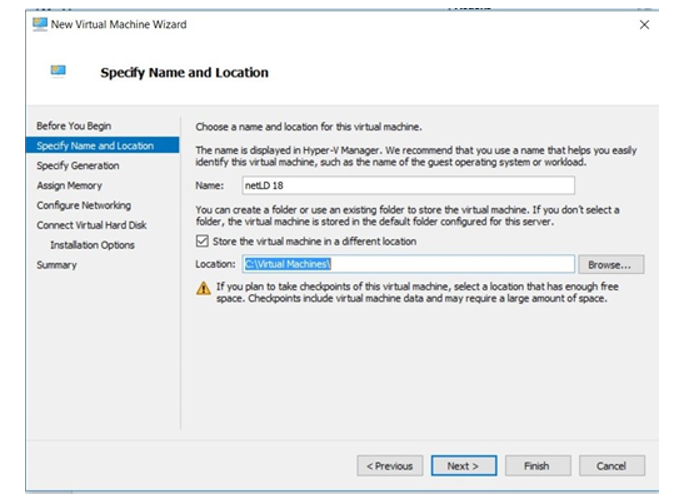
2. Enter a name for the virtual machine. If desired, change the storage location. Click [Next].
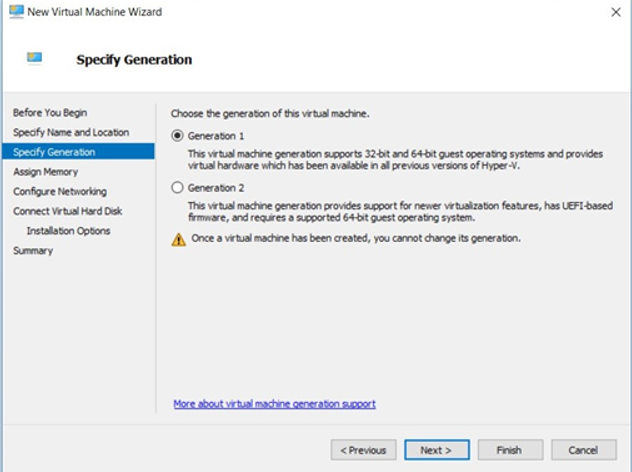
3. Select [Generation 1] and click [Next].
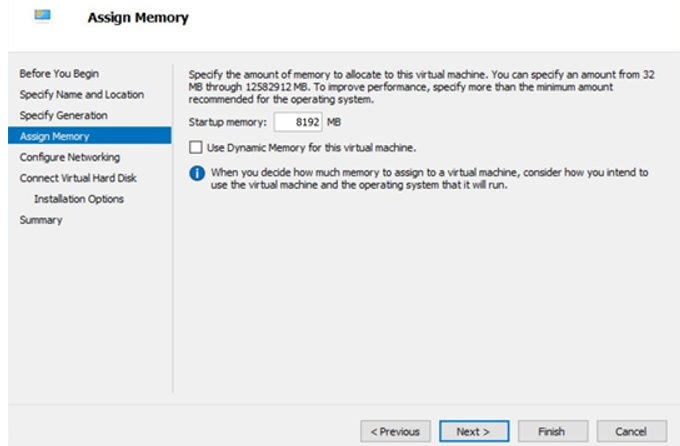
4. Set the [Startup memory] and click [Next].
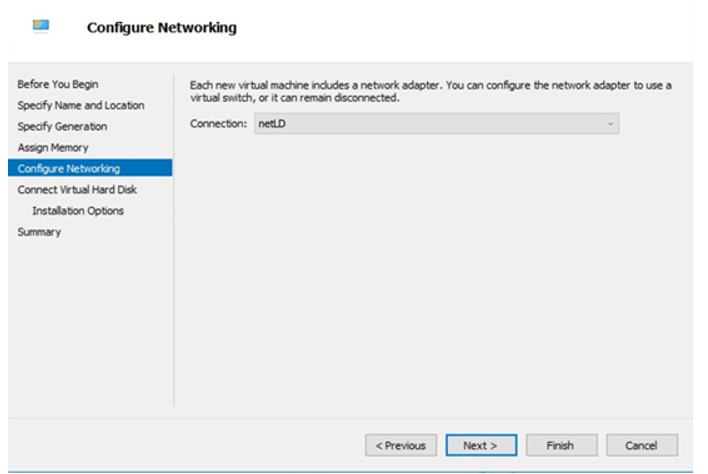
5. Next to [Connection:] select a virtual switch for the network connection and click [Next].
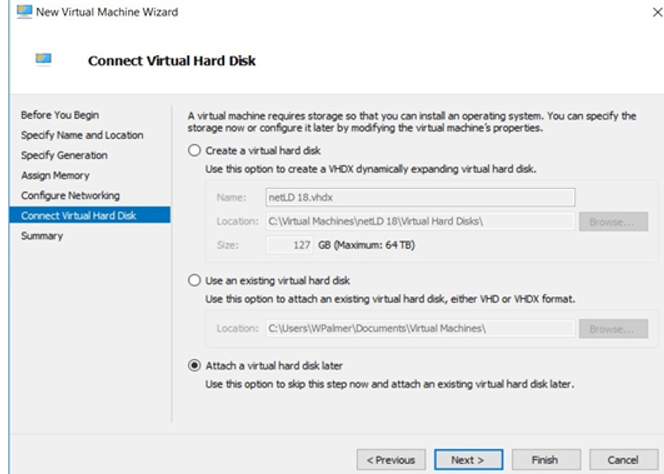
6. Select [Connect virtual hard disk later] and click [Next].
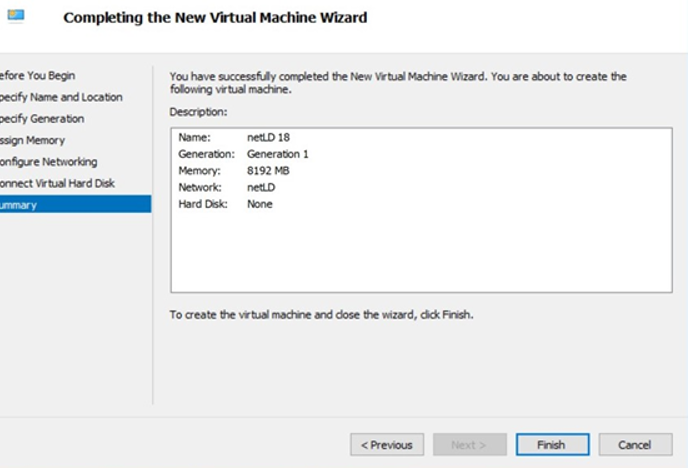
7. Click [Finish].
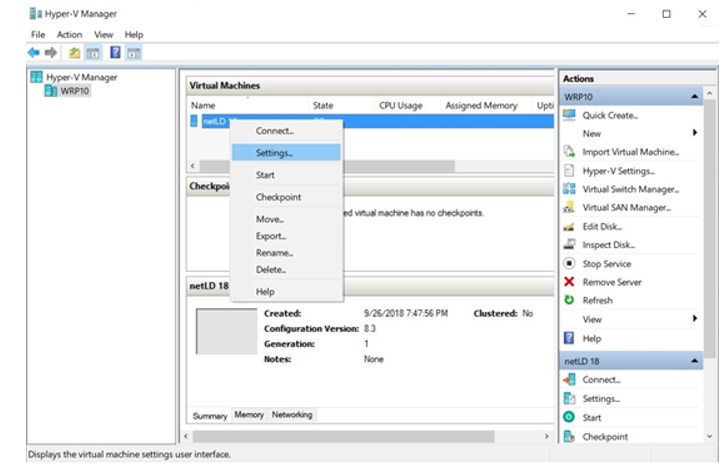
8. Right-click the virtual machine you created and click [Settings].
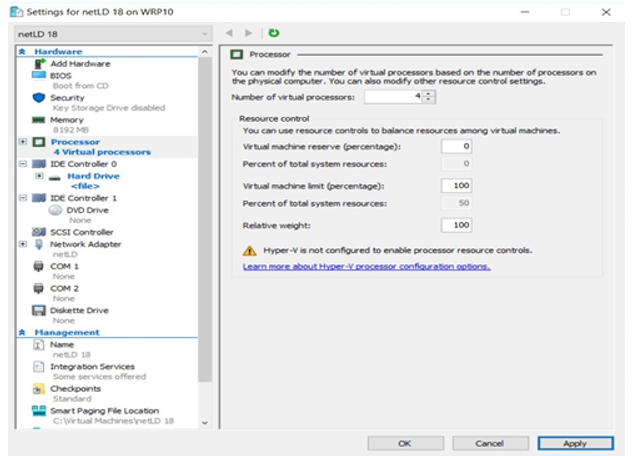
9. Click [Processor] and change [Number of virtual processors].
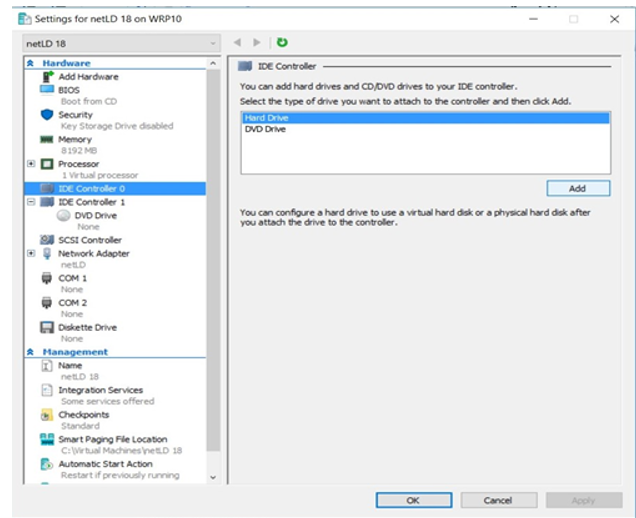
10. Click [IDE Controller 0], select [Hard Drive], and click [Add].
11. Click [Browse].
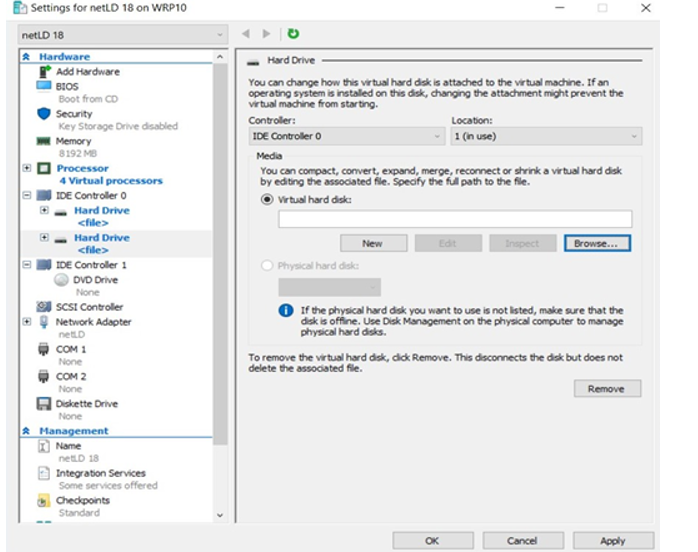
12. Browse to where you saved the downloaded .vhdx files, select disk1.vhdx, and click [Open].
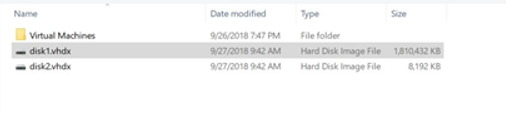
13. Repeat steps 10 to 12 to add disk2.vhdx.
14. Click the [+] next to [Network Adapter] and select [Advanced Features]. Add a static MAC address and click [OK].

After the deployment is completed, please [Start] and [Connect] to the virtual machine.
Get hands-on experience with ThirdEye for 30 day free of cost and assess it
by using our evaluation license.