

Posted on 21 August, 2023
In today’s digital age, virtualization has become an integral part of the IT infrastructure.
In today’s digital age, virtualization has become an integral part of the IT infrastructure. Among the leading virtualization software providers, VMware stands out as a reliable and efficient solution for businesses of all sizes. Setting up VMware requires careful planning and execution to ensure optimal performance and functionality.
The first step in a VMware setup is to determine the hardware requirements. This involves evaluating the server’s capacity, memory, storage, and network capabilities. It is crucial to select hardware that can handle the anticipated workload and provide sufficient resources for virtual machines.
Configuring networking settings is necessary for seamless communication between virtual machines and external networks. This includes assigning IP addresses, setting up VLANs if required, and configuring firewalls or routers.
Creating virtual machines comes next in the setup process. Each VM should be allocated sufficient resources such as CPU cores, memory, disk space, and network bandwidth based on its intended use. Additionally, installing guest operating systems within each VM allows users to utilize different software environments efficiently.
Lastly, it is crucial to implement backup solutions for data protection in case of system failures or disasters. Regularly backing up virtual machine images ensures quick recovery options.
Operating Environment:
| Item | Requirements |
| Virtualization Platform | ≥ VMWare ESXi 7.0
≥ Hyper-V (Windows Server 2012 R2 or greater) |
| CPU | ≥8 cores |
| Memory | ≥ 8 GB |
| Hard Disk | HDD 1: 8 GB (system area)
HDD 2: 50 GB or more (data area) |
| Supported Browsers
(We recommend that you use the latest version of a compatible browser) |
Google Chrome
Mozilla Firefox Microsoft Edge |
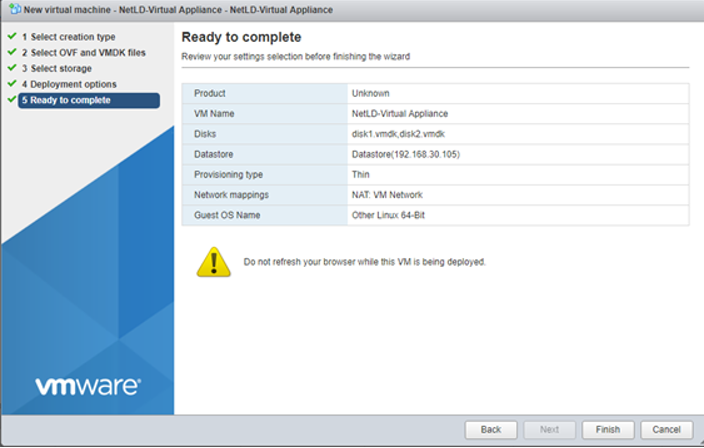
Deployment to VMware ESXi
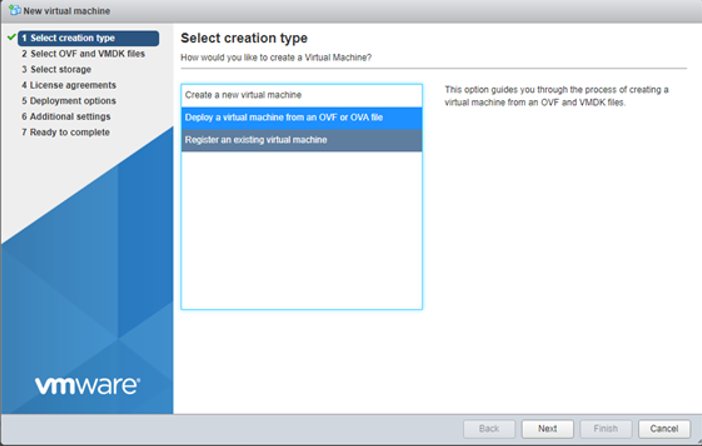
1. Login to Web UI, then click [Create/Register VM] from [Virtual Machines].

2. Select [Deploy a virtual machine from an OVF or OVA file], then click [Next].
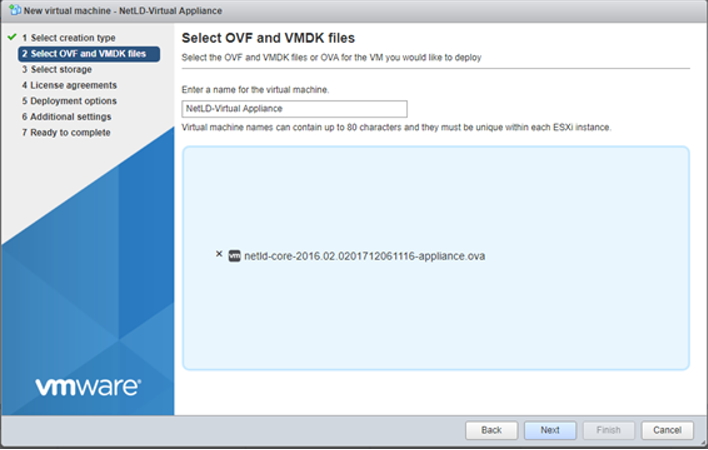
3. After entering the virtual machine’s name, drag and drop the LogicVein VA .ova file, then click [Next].
4. Select storage, then click [Next].

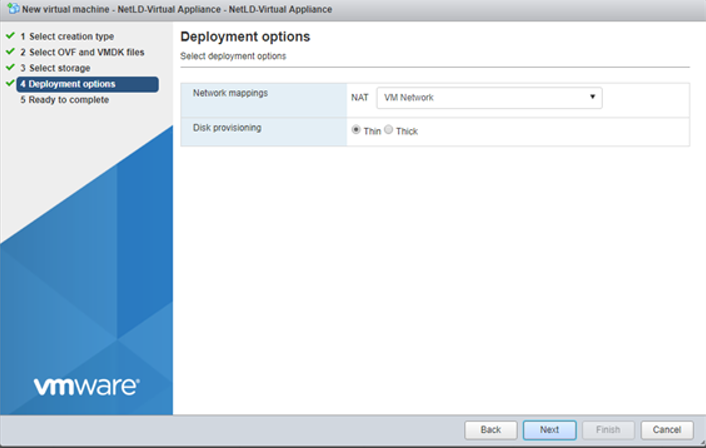
5. Select Network and Disk Provisioning, then click [Next]. *For [Disk Provisioning], [Thin] is recommended.
6. Click [Finish].
After the deployment is completed, start the new virtual machine
Get hands-on experience with ThirdEye for 30 day free of cost and assess it
by using our evaluation license.